Set up custom attributes in Bringg to customize workflows to your needs, from tracking driver certifications to marking priority orders. For example, flag VIP customers to ensure their orders receive expedited handling throughout delivery.
Before You Begin
Confirm you have a Bringg user of type Admin.
Add Custom Attributes
Step 1: (Recommended) Add custom details under the extras field in your Create Order payload.
Step 2: Add a new custom attribute by selecting your username > Settings > Merchant Configurations > Custom Attributes > + New Attribute.
Bringg scans your order payloads from the last 90 days to find unmapped fields that you use often. You can add these suggested fields, by selecting +Add in their row.
.png)
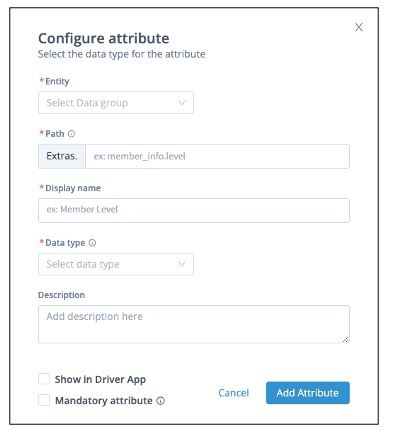
Step 3: Enter the attribute details.
 Enter the attribute details
Field | Description |
| Entity | Select the data group the custom attribute is related to. Currently, all custom attributes must relate to the Order entity |
| Path | (Recommended) Enter the attributes data path. This should match the "field" input in the Create Order payload within Extras. For example, in this payload, the Pathis "member_info.member_id" |
Display name | Enter an easily recognizable name that appears in Bringg features like the order page or filters. For example, name an attribute defining the ID or status of a customer as either "Membership ID" or "Membership Status" so that you can later filter orders by that attribute. |
| Data type | Select the attribute's data type so Bringg knows what options to display for it. Data types can be Number, String, Boolean, or From list. |
| Description | Enter a description that allows users to quickly understand what the attribute is used for. For example, you may describe which membership IDs require a different level of delivery service. |
| Show in Driver App | Select to display the custom attribute in the Driver App's order screen. |
| Mandatory attribute | Select to define a custom attribute as a mandatory field in the API payload. Once defined as mandatory, if the attribute is missing from the payload, the API call will return an error. |
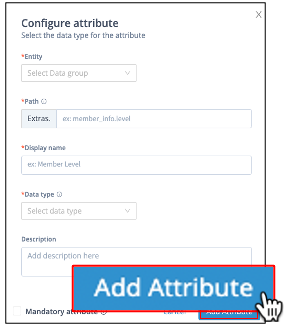
Step 4: Select Add Attribute to save.
 Save the custom attribute
Manage Custom Attributes
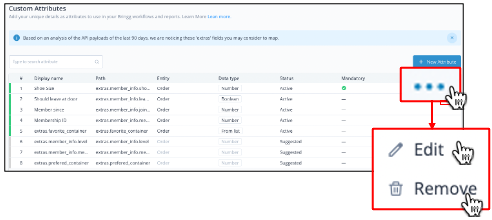
Select the ellipses icon to edit or delete an existing attribute.
 Edit or delete a custom attribute
Implement Your Custom Attributes
Use the custom attribute as options in various Bringg features, such as:
- Details in the order pages to understand how the order or its inventory is classified.
- Columns and filters in the Dispatch and Planning views to see orders with those specific attributes.
- Displaying in Bringg Driver App.
- Triggers, Conditions, or Update Order Actions in Automations.
- Elements that can be updated by custom actions and viewed in the Order Activity Log.
 Use custom attributes throughout Bringg