Add or View Service Areas
- 05 Jul 2023
- 3 Minutes to read
- Print
- DarkLight
Add or View Service Areas
- Updated on 05 Jul 2023
- 3 Minutes to read
- Print
- DarkLight
Article Summary
Share feedback
Thanks for sharing your feedback!
You can add or view service areas in Bringg, so you can orchestrate teams with precision and strategically assign orders, optimize routes, and minimize fulfillment delays. Bringg sends orders to your team if it's responsible for the service area of the order's destination.
You can also use service areas to:
- Assign drivers to a specific geographic area within your team's delivery scope.
This way, drivers can be familiar with their specific area. - Separate regions on the map to align with your business practices. For example, if your team serves only specific zip codes within a city, define your service area based on those zip codes.
Before You Begin
- Confirm you have a user of type Dispatcher (or admin).
- Ask your admin to grant you permission to add and edit service areas. Otherwise, you can only view your team's service areas.
Procedure
Step 1: Access your team's service area page by selecting Drivers > Teams > [Team Name] > Service Areas in the Bringg Platform.
.png) Access service area page
Access service area page
You can then see any service areas applied to your team, either in map or list view.
 View services areas in map or list
Step 2: (Permission required) Add a new service area by selecting Add Service Area > Add manually.
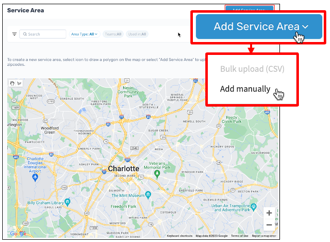 Add a service area
Coming soon! You can add multiple service areas at once via CSV upload by selecting Add Service Area > Bulk Upload.
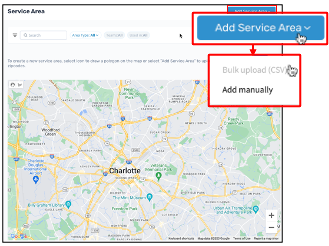 Create service areas with a CSV upload
 Create service areas with a CSV upload
 Step 3: (Permission required) Give the service area a recognizable name.
For example, name a service area that covers a certain neighborhood with that neighborhood's name.
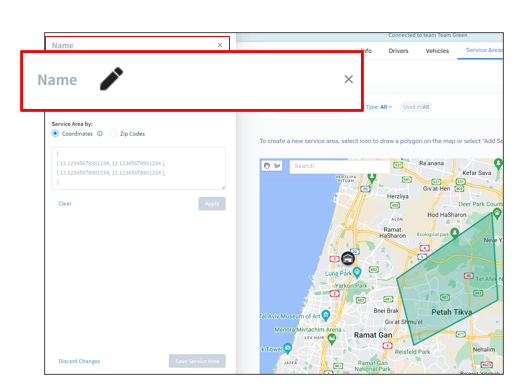 Name the service area
Note
You must name a service area in order to be able to save it.
Step 4: (Permission required) Define the geographic scope of a service area by entering polygon coordinates or zip codes and then selecting Apply.
In order to include your service areas in {{glossary.route optimization}}, define your service areas with polygon coordinates rather than zip codes.
Tip! Select the information icon to view the formats for each input.
 Enter a polygon or zip codes
Tip!
You can also create a service area by selecting the polygon icon and drawing a polygon on the map.
Click on a point on the map. Then move your cursor to the next point, and click again.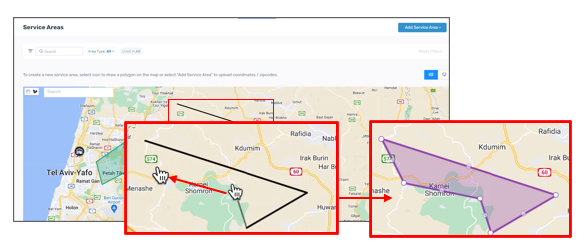 Draw a polygon on the map
You can also create a service area by selecting the polygon icon and drawing a polygon on the map.
Click on a point on the map. Then move your cursor to the next point, and click again.
 Draw a polygon on the map
Step 5: (Permission required) Set the dates when a service area is active with your team.
In the list view, click on the Effective Date to adjust the period when your team uses this service area. Then select OK.
For example, your team may work in service area A year-round, and service area B only during the holiday seasons.
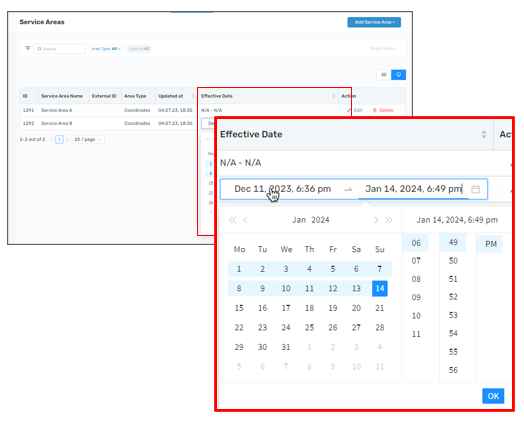 Set the effective dates of each service area for your team
Step 6: Activate the area by selecting Save Service Area.
.png) Save to activate the service area
Save to activate the service area
Step 7: Review your service areas by viewing them on the map or as a list, by selecting the list or map view icons.
.png) Review your service areas
Review your service areasStep 8: Adjust the service area's geographic scope by selecting Edit either by clicking on the polygon in the map, or from the list view.
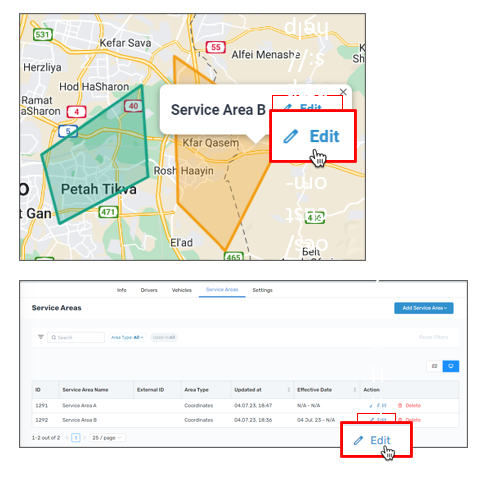 Edit a service area
Step 9: Remove service areas your team does not need by selecting Delete from the list view.
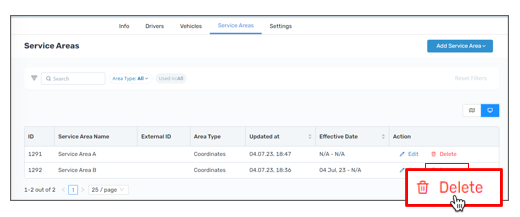 Delete a service area you no longer need
Was this article helpful?