Set up Single Sign-On (SSO) access to add a layer of security and enable users to log in using the same credentials that they use for your other management systems through your Identity Provider (IdP) app dashboard. Bringg provides all the account details you need to integrate with your IdP, so you can set up SSO and get your users online quickly.
Users can also log in to the Bringg Platform directly by entering their email and password directly into Bringg's login page.
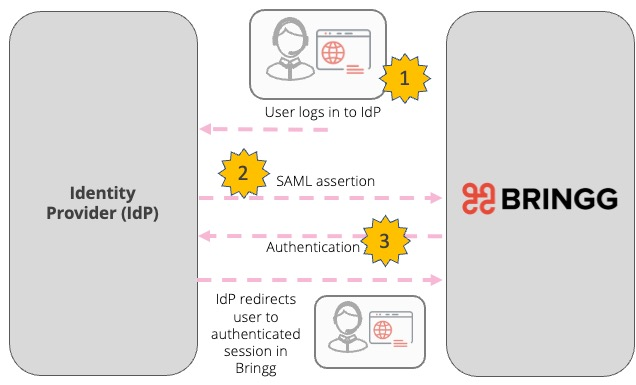 Enable SSO Identity Verification
Before You Begin
- Confirm you have a Bringg user of type Admin.
Access Your Bringg Data
Step 1: In the menu bar, select your username, then select Settings > Platform Integrations > SSO Configuration.
Step 2: Integrate Bringg to your Identity Provider (IdP) using the data that Bringg provides.
To copy this information, select the Copy SSO URL and Copy Audience URL when your IdP requests that you enter each.
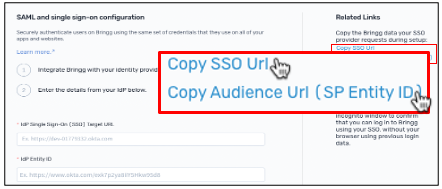 Copy SSO data from Bringg
There are a number of SSO providers on the market. Most share the same terminology, but it does vary.
Field | Description |
|---|---|
SSO URL | This is where your IdP sends authentication data when you sign in. |
Audience URI (Also known as SP Identity ID) | This URI (Uniform Resource Identifier) is how your IdP confirms that a request for access is coming from Bringg. |
Configure your Identity Provider
Configure your IdP to send user details to Bringg. These is often described as claims or attributes in your IdP:
Field | Description |
|---|---|
first name, last name | Bringg uses this as the user's display name. |
Bringg uses this as the user's username. | |
teams | (Optional) Use to automatically assign the new user to one or more teams. Use your IDs for teams. |
dispatcher | (Optional) Usually set as a default so any new user is a dispatcher user type unless specified otherwise. |
admin | (Optional) Use to assign new users with an admin user type. |
driver | (Optional) Use to assign new users with a driver user type. |
privilege ID | Use to grant the new user access to certain screens and actions, that differ from the default set of permissions. |
Add Your IdP Details to Bringg
Step 1: Enter the details provided by your IdP.
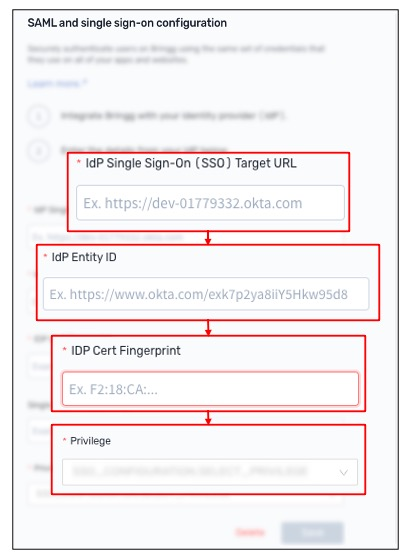 Enter your SSO identification data
Field | Description |
|---|---|
IdP Single Sign-On (SSO) Target URL (Also known as Login URL) | (Coming soon) This is the URL that Bringg redirects you to so you can login to your IdP (coming soon). |
IdP Entity ID (Also known as Provider ID) | This is the data that tells Bringg where the request for access is coming from. |
IdP Cert Fingerprint-SHA 256 (Also known as Signing Certificate Fingerprint) | This is how Bringg authenticates that the request for access is coming from your IdP. If your IdP provides you with a X.509 public certificate instead of its abbreviated fingerprint, you can convert it using the fingerprint calculator. 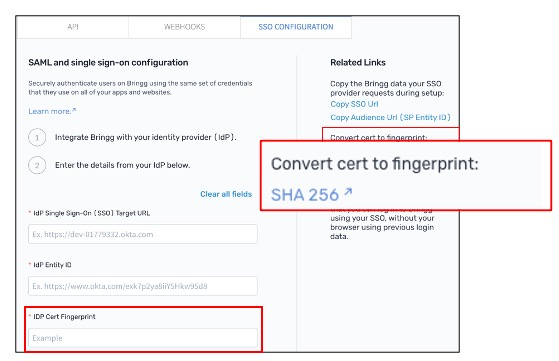 Convert X.500 public certificate using a fingerprint calculator Convert X.500 public certificate using a fingerprint calculator
|
Single Logout (SLO) Target URL | (Optional) This is how Bringg ends your IdP session when you sign out of Bringg. Use this if you want users to be logged out from Bringg when they log out from your IdP. |
Privilege | When you create new users through your IdP, they are automatically assigned the dispatcher user type, which is the most basic access level. If needed, you can then update their user type in Bringg to assign admin permissions. |
Step 2: Select Save to activate SSO access to Bringg.
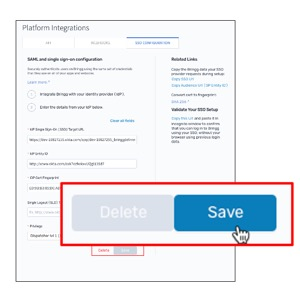 Save to implement SSO
Test SSO Access
Step 1: To test your SSO access to Bringg, copy the URL provided and paste it into a browser that does not have your login information stored, such as an incognito browser. Then, log in to Bringg using your SSO.
If you are unable to access Bringg using SSO or are not redirected to your IdP's login page, check to make sure that all fields are filled correctly, and contact your Bringg customer service representative if the error persists.
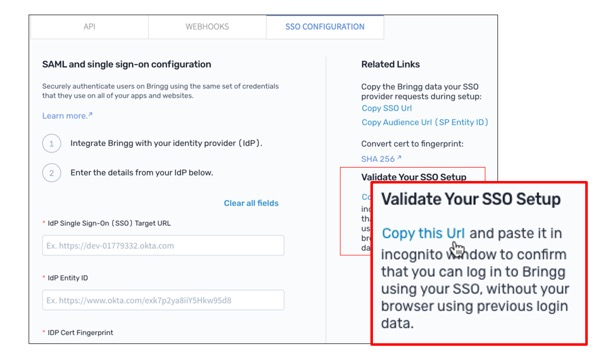 Copy the URL to login to Bringg via your IdP
Step 2: Instruct your users to log in to the Bringg Platform using SSO.
- Users can log in from your IdP's app dashboard by selecting Bringg from the list of apps and services that use your IdP for authentication.
- Users can also access your IdP's authentication page for Bringg with a merchant specific URL.
Select Copy this URL and instruct your users to bookmark the URL and use it to log in to Bringg.