Once you have created a shipment by packaging fulfillment items, finalize the shipment by booking a carrier and service level.
While many fulfillments require manual assignment, Delivery Hub can automatically suggest carriers and service levels to shipments based on conditions and priorities set in Shipping Rules, and your organization may preselect a carrier and service for each shipment when sending it to Delivery Hub. You can confirm the assigned carrier and service, or change the assignment when necessary.
For example, you may need to select a new carrier when the pre-assigned carrier has low capacity or has already completed their daily pickups. If you don't use Shipping Rules or if none of your rules cover the specifics of a shipment, you can manually book a carrier and service level for each shipment.
Before You Begin
Make sure you have the packer or admin user role.
Become familiar with your organization's priorities. For instance, if two different services promise to deliver a package by the date and time promised in the Service Level Agreement (SLA), should you book the cheapest or fastest service?
Assign packaging to the inventory for the fulfillment you want to book.
Book a Carrier and Service Level
Confirm automatically suggested carrier and service level
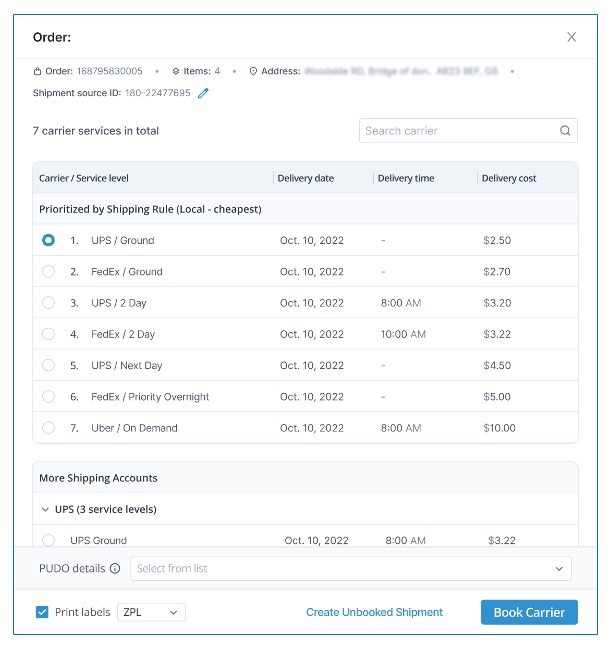
When you select Create Shipment, Delivery Hub automatically runs through your shipping rules and displays the results at the top of the carrier selection modal in the prioritized order. For example, if your shipping rule prioritizes the cheapest quote from a list of carriers, the cheapest appears at the top of the modal.
To confirm the automatic selection, select Create Shipment > Book and Print to confirm the booking and send shipment documentation to the printer, or select Set Carrier > Book to confirm without printing.
View and confirm carrier assignments based on shipping rules
Manually assign a carrier and service level
Step 1 Select Create Shipment to view the carriers and services available for the shipment.
Step 2 Select a service level from the list. Be sure to compare the delivery date next to each available service level against the date next to Deliver by (SLA) in the header, and select a service that arrives on or before the SLA. For each carrier that provides this information, you can also view the delivery cost for the services listed.
If there is a matching shipping rule but the automatically selected carrier and service are not a good fit for the shipment, use the Prioritized by Shipping Rule list to quickly find the most relevant carriers and services.
Step 3 (Optional, PUDO fulfillment method) Delivery Hub automatically creates a list of recommended pickup/dropoff (PUDO) locations based on your carrier and service selection and the recipient’s address. Select from the dropdown list next to PUDO details to choose the pickup location.
Step 4 Select Book & Print to finalize this shipment by booking the carrier and service and printing the shipment's documentation. To confirm without printing, select Book instead.
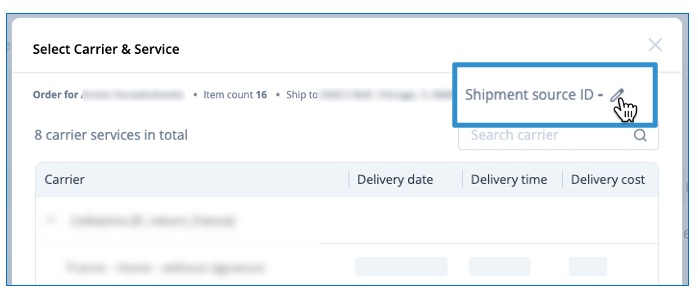
Add a Source ID
You may want to include your external system’s ID for a shipment in Delivery Hub to make it easier to align information between systems and make it easy for customers and support representatives to stay on the same page and find orders.
To add a Source ID, select Create Shipment, then select the edit icon ![]() next to Shipment Source ID, enter the ID, and then hit the enter key to confirm. The source ID is saved when you select Book Carrier or Save Without Booking.
next to Shipment Source ID, enter the ID, and then hit the enter key to confirm. The source ID is saved when you select Book Carrier or Save Without Booking.
(Optional) Enter a source ID for the shipment
If you have already booked a carrier for a shipment, you can add the Source ID from the shipment details screen. Learn more.